Skip to content.

⚠️ Any offers or candidate interviews from emails different than @uttr.com are phishing attempts not representing UTTR LLC. You can contact us directly if in doubt.

Any offers or candidate interviews from the domain uttr.top are phishing attempts not representing UTTR LLC. You can contact us directly if in doubt.

On-demand webinar coming soon I ABM in 2024: How it's changed 👀

Tag Manager

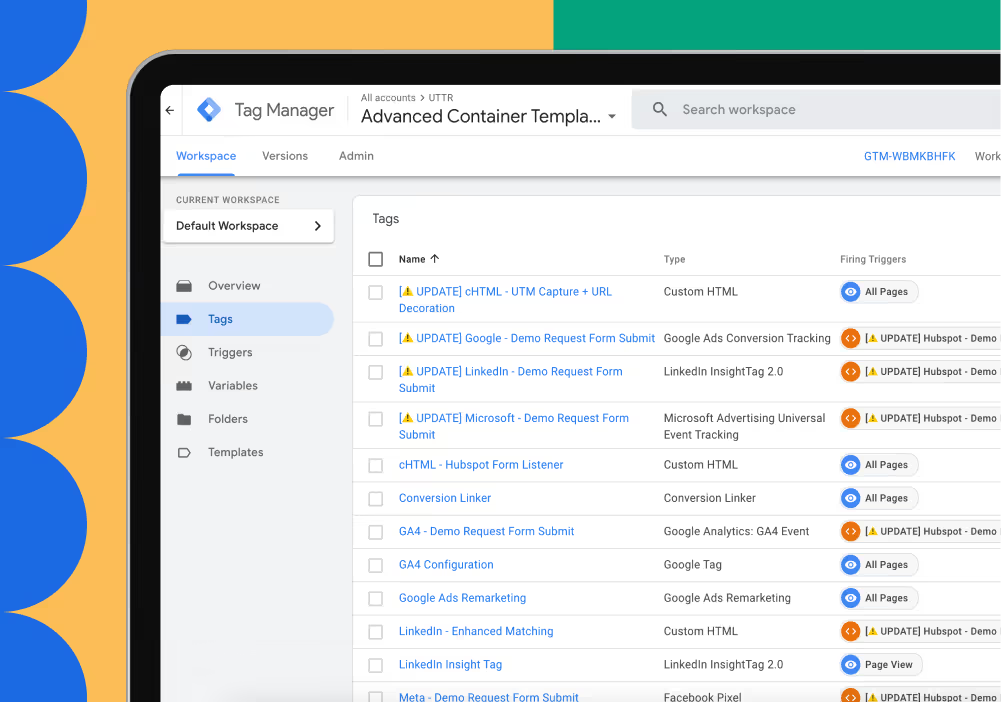
Advanced Google Tag Manager Container

Having trouble seeing where your traffic is coming from? Do you lose data navigating between different domains? Is your CRM always showing “Direct” as the lead source?

Our custom script makes it easy to ensure no UTM values get lost while users browse your site. Also includes pre-configured tags for enhanced conversions.

Tailored for quick and easy implementation, it's ideal for companies utilizing Hubspot embedded forms across their marketing sites.
One time payment
20
Free

Questions you can answer with our 

Advanced Tag Manager Container

What platforms are included?

This container includes the pixel/ tag definitions for GA4, Meta, LinkedIn, TikTok, Google & Bing Ads. All of these have been setup to send the 'email' parameter for enhanced conversions. Additional user data points (such as phone number, name, etc) can also be added easily as new data layer variables.

What events are included?

It includes a Hubspot form submission event, filtered to a specific form based on its GUID. It also includes a UTM script which captures these values if they are present, stores them for 30 days, appends them across domains and also populates any hidden fields in your HS form upon submission.

Is this easily customizable?

Absolutely! Just follow the instructions below on how to add your own IDs, and then anything else you need can be added in, or removed before publishing. Additionally, the custom UTM script has instructions written inside the tag on how it can be adjusted to your needs.

What if I get stuck during the setup?

You can email jovana@uttr.com and our template specialist will respond as soon as possible to help.

How to start using the 

Advanced Tag Manager Container

After clicking "Download" you will see this screen:
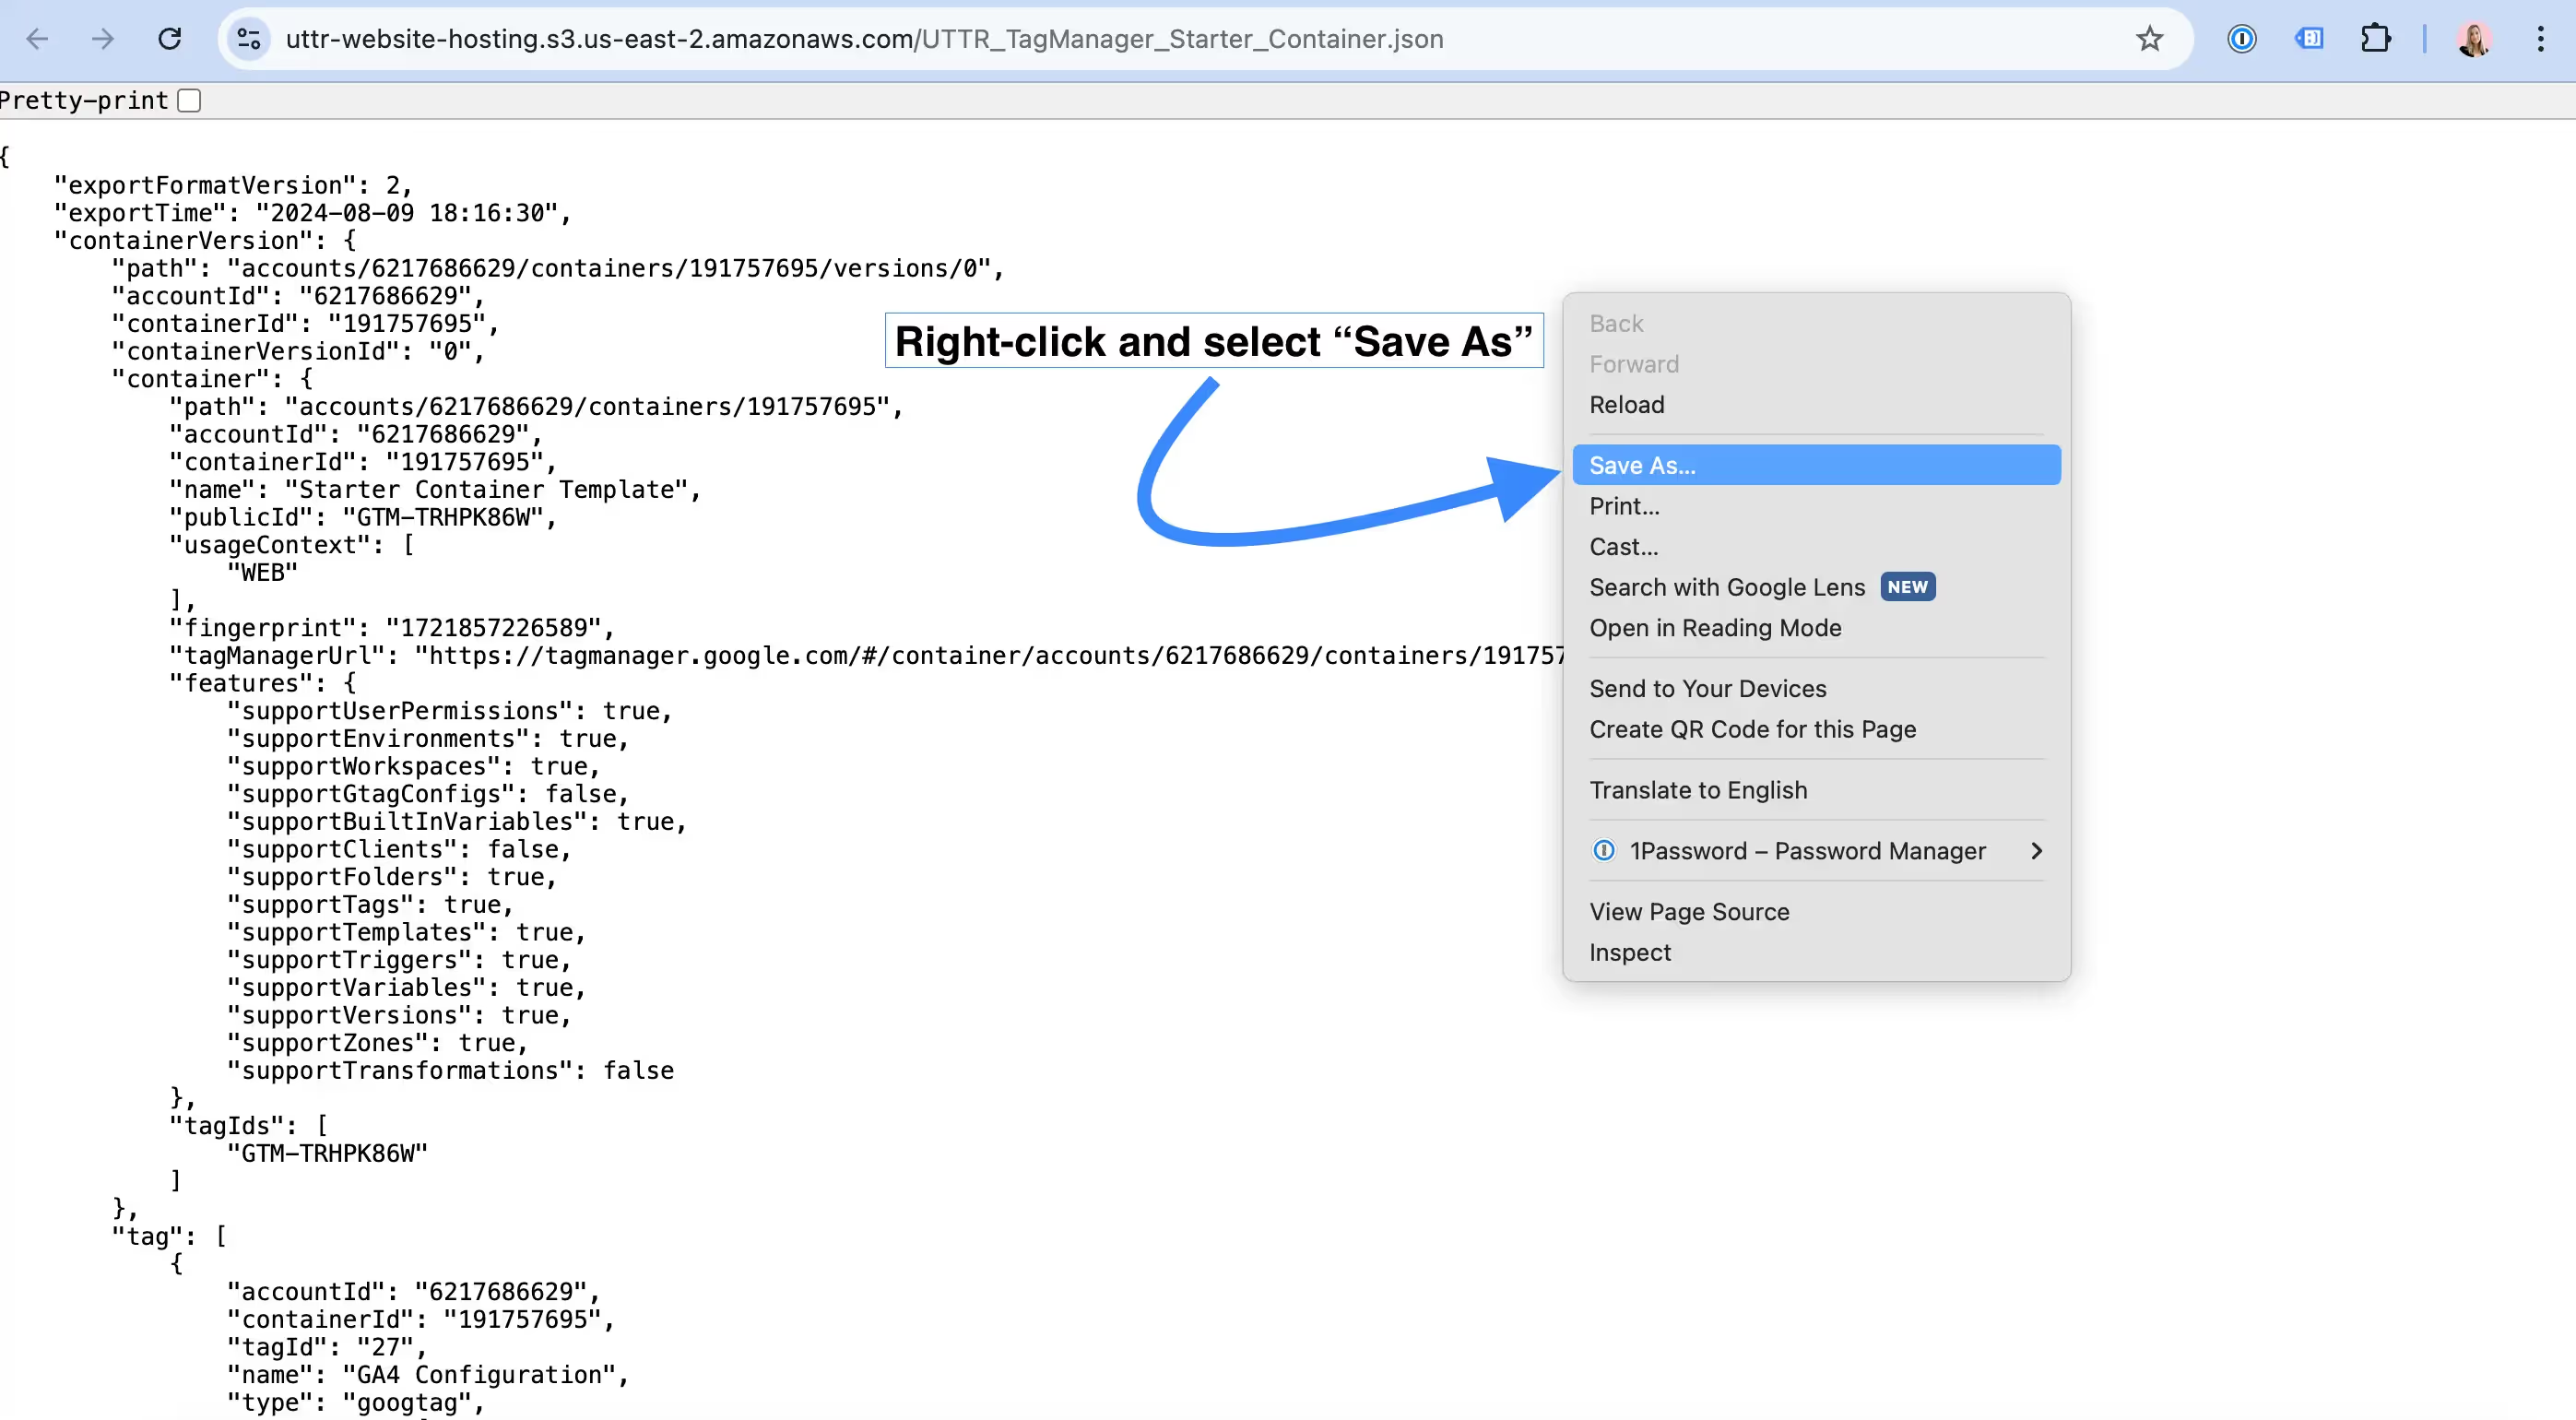
Proceed to follow the below steps to upload this .json file in Tag Manager.

Updating the "[⚠️ UPDATE]" sections of the container

All tags, triggers and variables with "[⚠️ UPDATE]" in the name must be updated in order to be be linked with your own paid platform accounts.

Helpful Links

  • Finding your GA4 Measurement ID, link here.
  • Finding your Google conversion ID and conversion label, link here.
  • Finding your Meta pixel ID, link here.
  • Finding your LinkedIn partner ID, link here and conversion ID, link here.
  • Finding your Microsoft UET tag ID, link here and conversion action, link here.
  • Finding your TikTok pixel ID, link here.

Enhanced Conversions Links

  • Finding your GA4 settings, link here.
  • Finding your Google Ads settings, link here.
  • Finding your Meta settings, link here.
  • Finding your LinkedIn settings, link here.
  • Finding your Microsoft settings, link here.
  • Finding your TikTok settings, link here.
Step 1
Create two dropdown properties on the contact called ‘How Did You Hear About Us Tier 1’ and ‘How Did You Hear About Us Tier 2.
Step 2
Add the new properties to existing forms in Hubspot and other data collection /conversion points.
Step 3
Create new workflow(s) to overwrite existing attribution data in these specific use cases based on user inputs.
Step 4
Build reporting to monitor How Did You Hear About Us alongside traditional attribution properties (UTM data, original source etc.)
Step 1
Click the “Download” button.
Step 2
Enter the Google Ads "Account ID" of the account you wish to use.
Step 3
Click "Edit and share" in the top right hand corner.
Step 4
Click "Acknowledge and save" on the pop-up.
Step 1
Click the “Download” button.
Step 2
Enter the GA4 “account ID” & “property ID” of the analytics account you wish to use.
Step 3
Click “Edit and share” in the top right hand corner.
Step 4
Click “Acknowledge and save” on the pop-up.
Step 1
Click the "Download" button, right-click on the page and select "Save As".
Step 2
Navigate to the Tag Manager home page here.
Step 3
Create a new Tag Manager account.
Step 4
Create a new Tag Manager container.
Step 5
Under the "Admin" tab, select "Import Container" to upload the template.
Step 1
Click "Download Now." You will receive a zip file containing the HTML email templates. Unzip it and open the "hubspot.html" file with an HTML editor.
Step 2
In Hubspot, navigate to 'Content' then 'Design Manager.' Click the 'Create a New File Button' and choose 'HTML + HubL' from the drop-down menu.
Step 3
Select "Email" from the "Template type' drop-down. Give the template a name and file location, then click "Create."
Step 4
Remove all HTML code from the new file, then copy all HTML in the unzipped email code. Paste the copied code into the blank file. Click "Publish Changes."
Step 5
Navigate to "Marketing", then "Email" and click the "Create email" button to build a new email with one of your new custom templates.
Step 6
Choose the email type "Regular", and find the uploaded template in the "Custom" tab. Name your email, click 'Create email' and start editing the content.
Step 1
You will receive a confirmation email that your order has been received.
Step 2
Click the link in that email and follow the prompts to grant UTTR the correct access to your Hubspot account.
Step 3
Hang tight while we drop the templates and modules into your account, within 72 hours max.
Step 4
The wait's over. We'll send you an email when this process is complete.
Step 5
Watch our quick tutorial videos for more tips and tricks to get the most out of your new templates.
Step 6
Remove us from your account and get back to creating brilliant emails.

Video Instructions

Accelerate your revenue OKRs with UTTR